
A Mystery Dinner Party is no easy feat, especially when deciding to write it yourself. The first bit of advice I can give is – make sure you give yourself enough time to plan it. I gave myself 6 weeks and I needed it. I had 6 adults and 5 children who wanted to play. The main reason I wanted to write it myself was because I wanted to make it appropriate for children but also challenging enough for adults to play.
My husband and I decided we would host and facilitate the game instead of playing. We divided groups to search 5 rooms that we had set up with hidden clues, almost like an escape room, but instead the clues would lead to suspect files. This made us both available to prep the food, answer questions throughout the night, and help guests when they got stuck. My inspiration for our Mystery Game Night was the movie Clue. Wow, what a success this was! Everyone enjoyed it and found it challenging, interactive, and fun.
- Step 1: Creating the Storyline
- Step 2: The Invitations
- Step 3: The Clues
- Step 4: Suspect Folders
- Step 5: Decorations
- Final Thoughts
Step 1: Creating the Storyline
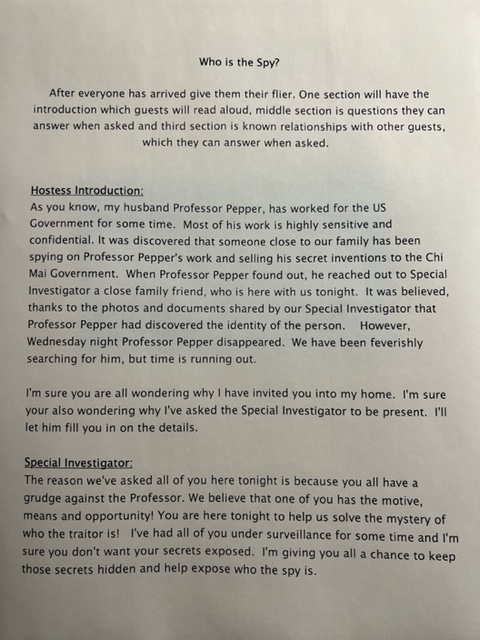
After I received confirmation of who wanted to play, I began writing my script. I came up with the idea of Professor Pepper, a weapons inventor, who worked with the US military. It was discovered that someone had stolen his secret inventions and sold them to a rival country. See sample script picture.
The script is used throughout the night between myself and my husband as a guide for: what to say, what should be done, when dinner and dessert should be served, and when voting should take place. It is our master guide!
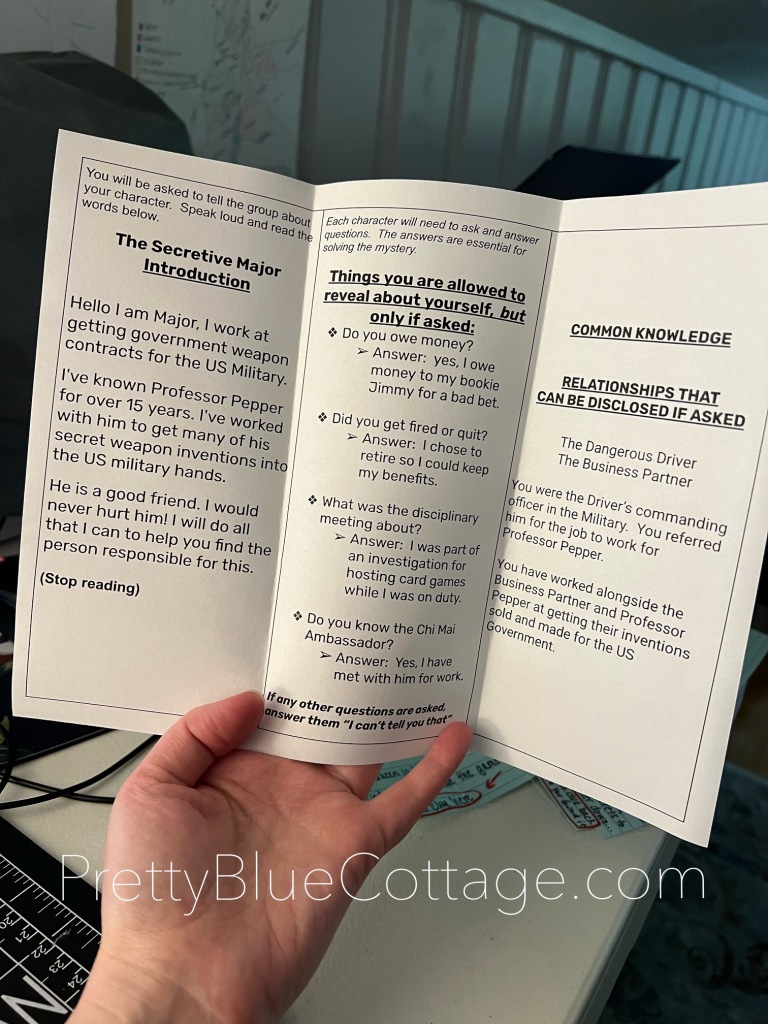
After I had my script, I created a Suspect Handout for each guest. The handout included: their Suspect Introduction (read aloud to the group), Things They Can Reveal About Themselves (if asked), and Relationships with Other Guests. They use this throughout the night as their guide.
Step 2: The Invitations
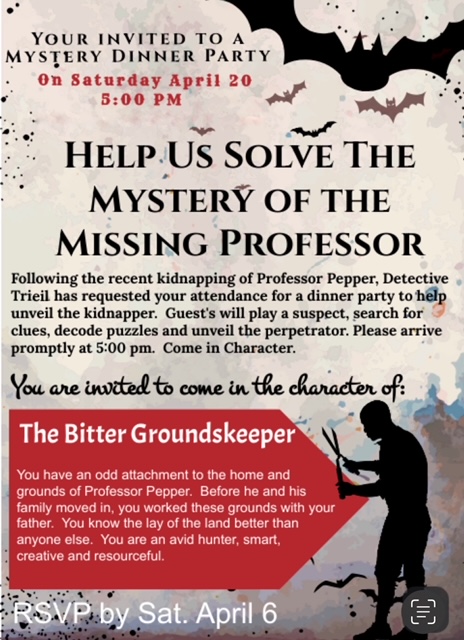
It’s important when hosting a Mystery Dinner that you know ahead of time who will be attending before you begin. Once I had my script finished and their character bio’s complete, I focused on creating an invitation. This included important details like the date, place, and who each guest will be playing for the night. This gives each guest enough time to get their costumes ready. I sent this invitation via text message and just edited the bottom portion about the character. I used a free site to create the invitation found here.
Step 3: The Clues

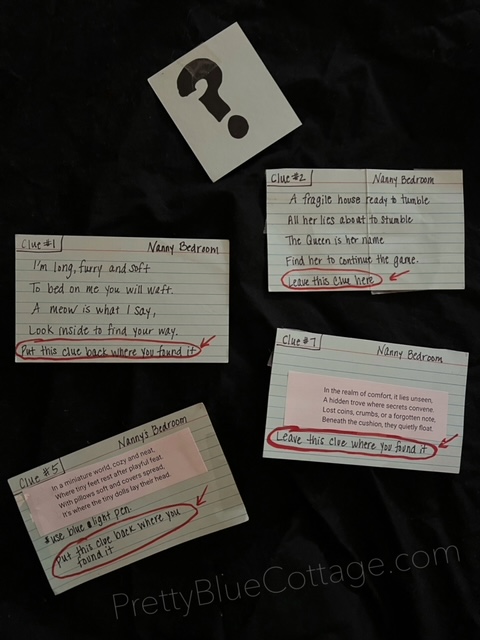
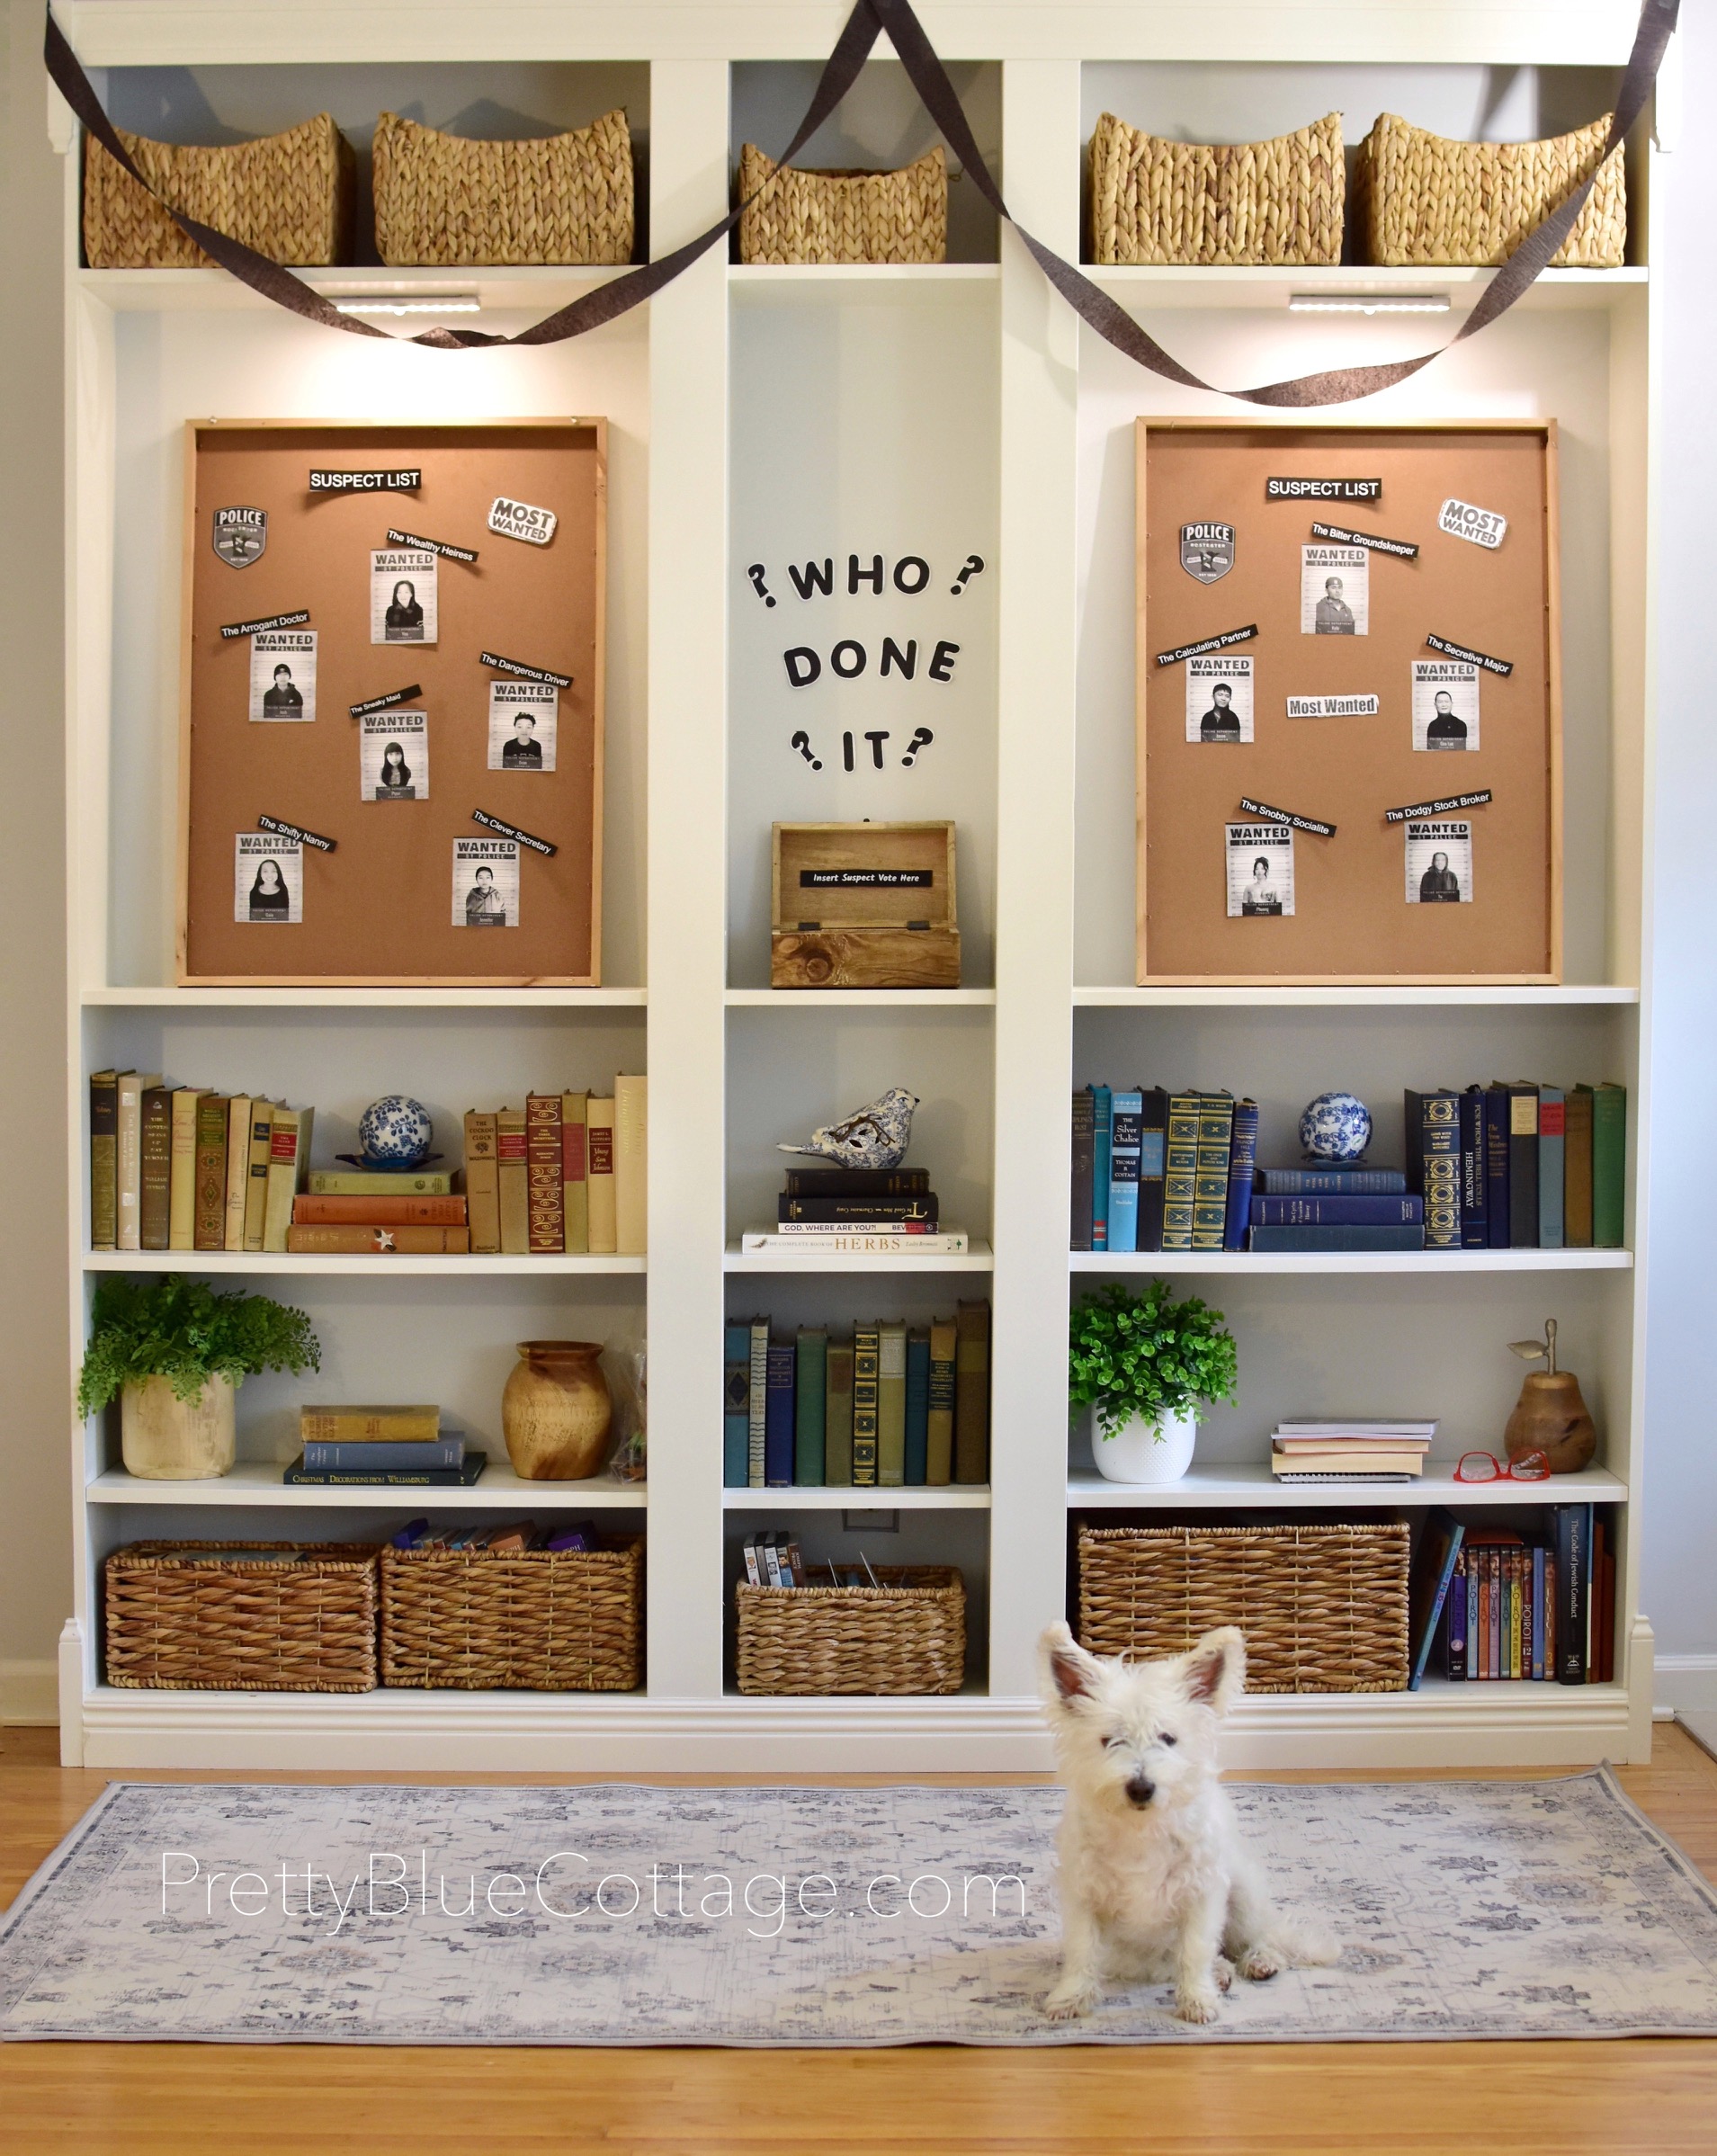
To make it more interactive and fun for the kids, I decided to create 5 rooms that would be searched during the night. Each room had a name and a clue color that went with it. This made it easier for them to find clues and for me to keep track of the rooms.
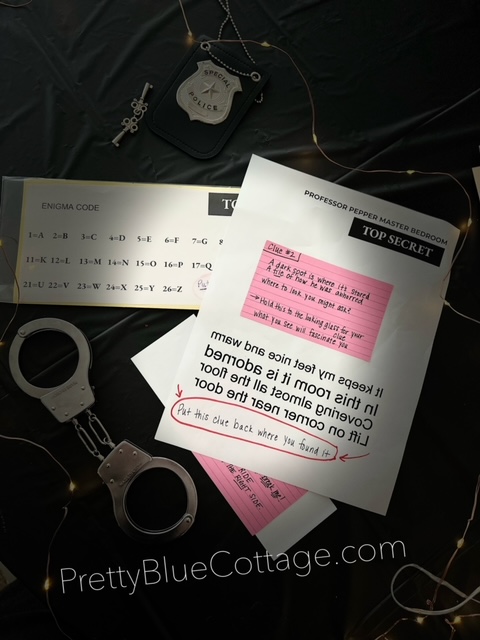
Each clue was written in the corresponding room color. When writing the clues, I looked around the room for places that would be good hiding places. An example of this was a deck of cards that I wanted to place a clue in. So I came up with this clue rhyme:
A fragile house ready to tumble
All her lies about to stumble
The Queen is her name
Find her to continue the game.
Clue 1 in each room started with a question mark and the clue. I told the guests it would not be hidden underneath or behind anything. They should enter the room and just look around. This ensured no one was tearing my home apart or looking through drawers. Each clue after that went in order (Clue 2, Clue 3, Clue 4, etc.). Each clue led to the location of another clue, until it would finally lead to the Suspect Folders. Each room had 6 to 7 clues and 2 Suspect Folders. If they found a clue out of order, they were not to read it. The clues all worked together and revealed information as it went, so if they skipped around, they would miss key details.

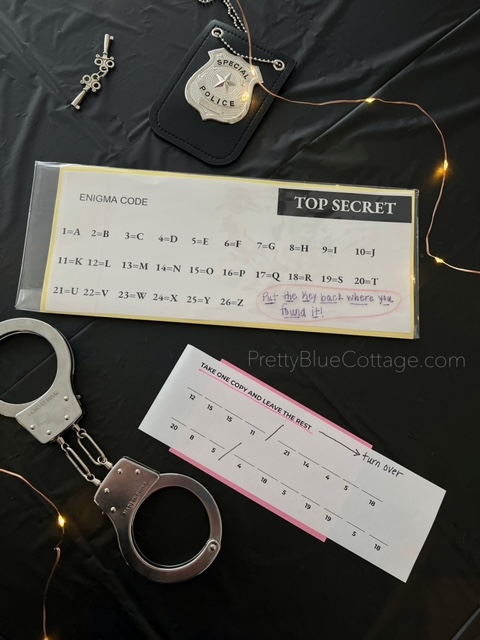
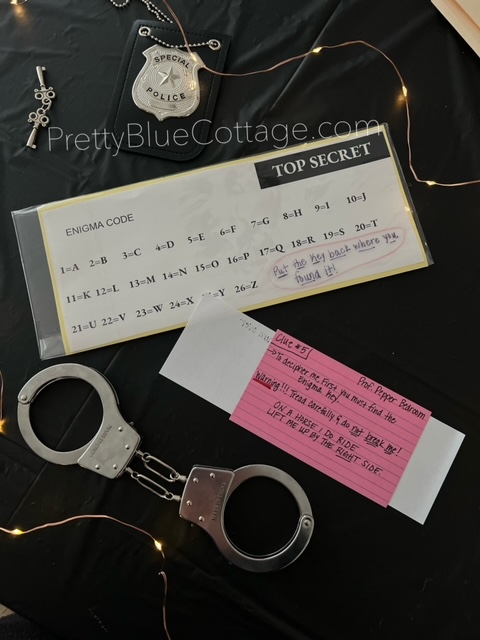
Most Mystery Dinner kits have you sitting around reading from a script. I wanted my guests to feel like detectives solving the crime and finding the perpetrator. I made it interactive and fun in the way I hid the clues. Some of the clues would only be revealed by using invisible black light pens; for other clues, they needed to find enigma codes to break them or the clue was written in reverse (use a mirror to read). I placed clues under the bed, in the window, in pill bottles, in boxes with labels, behind pictures, in books, taped under chairs–anywhere I thought was a good hiding place. Being creative and thinking outside the box makes it more fun. I created one clue that they needed to pop balloons in order to retrieve the clue inside. The kids had fun popping all those balloons (make sure to put rolled up paper inside of all of them so they can’t tell which one has the clue).


My privacy was also really important to me. That’s why I made the clues go in order and worked off of the prior clue to solve it. This eliminated useless looking; they just had to think through the clue rhyme. If they got stuck, my husband and I were available to help them think through solving it.
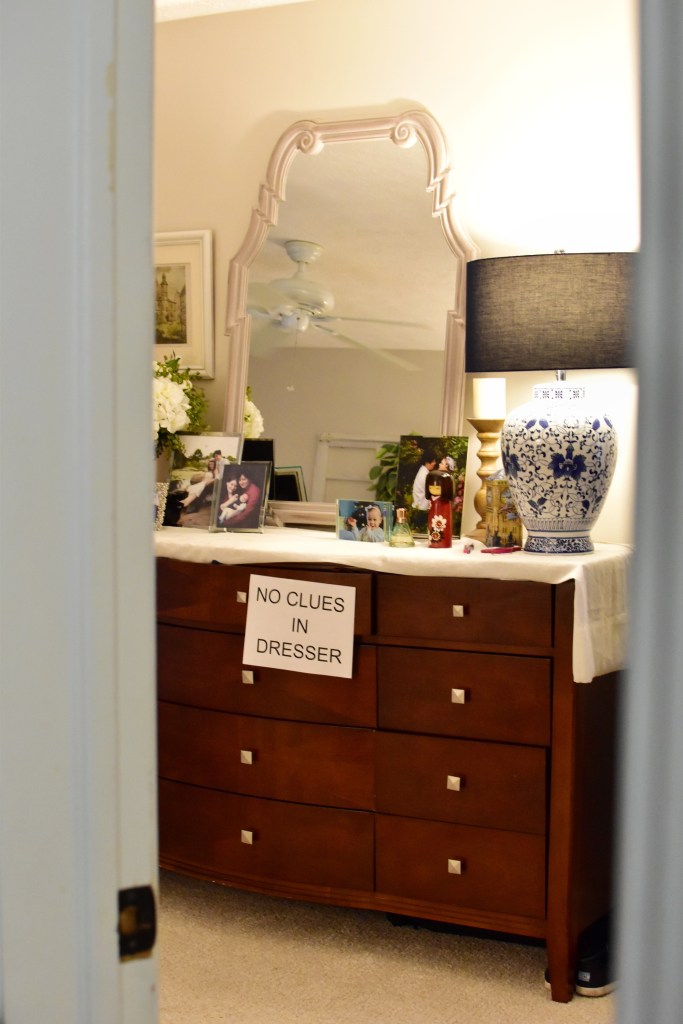
Another way I ensured that my privacy was being respected was by creating No-Clue Zones. I taped up doorways and put “No Clue Behind Here” signs in areas I did not want searched or opened. For all my closets, I put signs that stated, “No Clues in the Closet”.
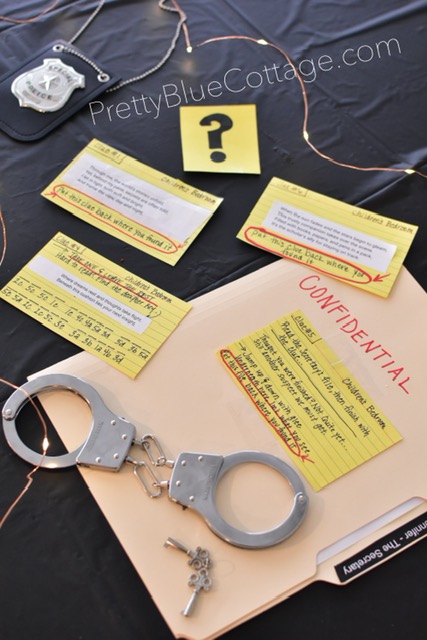
Step 4: Suspect Folders
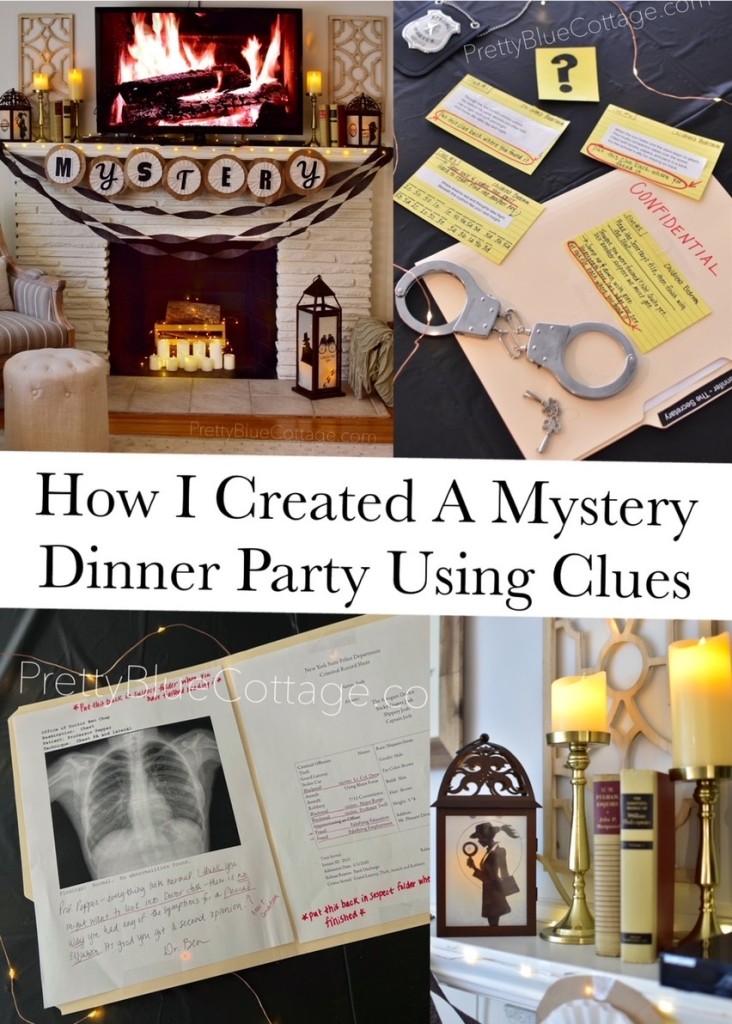
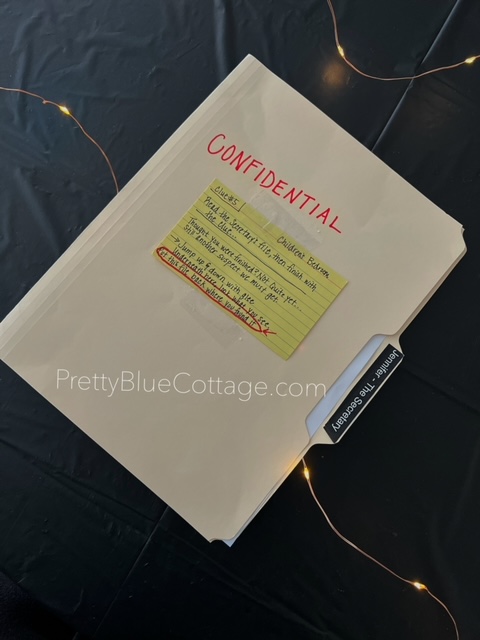
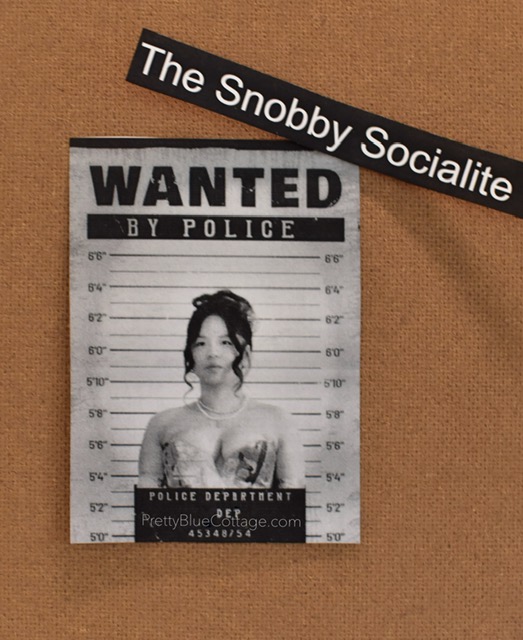
Each room had 2 hidden Suspect Folders that revealed vital information for ruling out a suspect or narrowing down a suspect. Every guest that arrived was given a character who was also a suspect that they would play. Naturally, everyone playing needed to have a Suspect Folder. Each Suspect Folder gave hints about the character, background, and involvement in the mystery of each guest. This is where I was really able to get creative. I created emails from suspects to Professor Pepper, travel logs, handwritten letters, memos, fake birth certificates, pictures, copies of text messages, newspaper clippings–anything I thought would be fun to discover.
The idea is that when the guests find a Suspect File, they take notes (or take a picture with their phone) and try to use deductive reasoning like:
Why is this important? How does this relate to the crime? What kind of questions will I ask the Suspect/Guest once I've finished with this room?
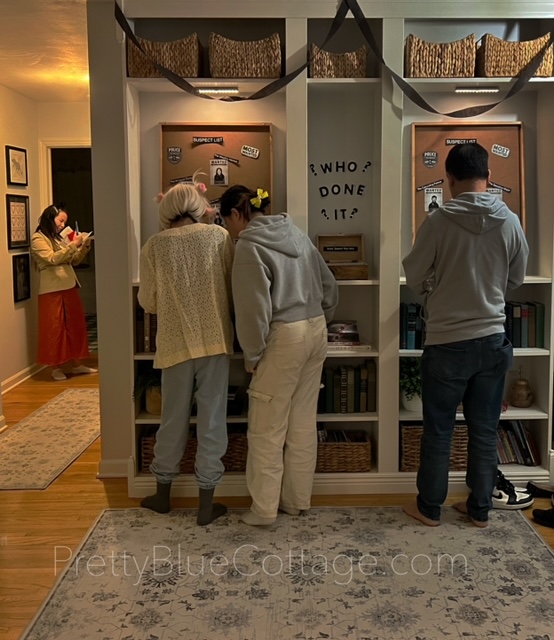
I found the adults helped the younger kids with this portion of the game. I also found the adults took this very seriously. When they had finished searching the room and found both Suspect Files, they pulled the person aside and started grilling them. Each guest could answer the questions based on the handout they were given at the beginning of the night.
Some Suspect Files had clues leading to the other Suspect File 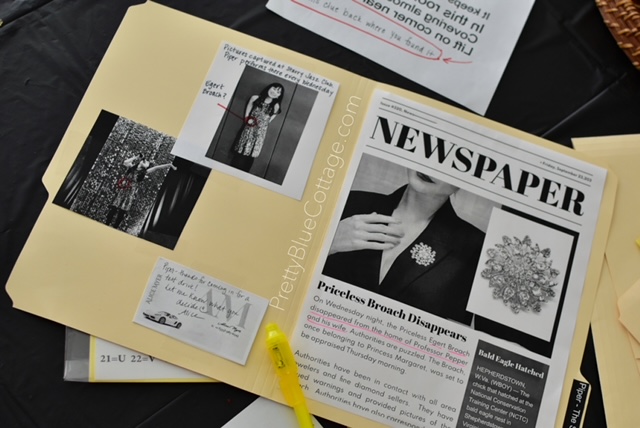
Another Suspect File with a Fake Newspaper Clipping, Pictures on Suspect and Business Card. 
Suspect File on corrupt doctor with a criminal record sheet. 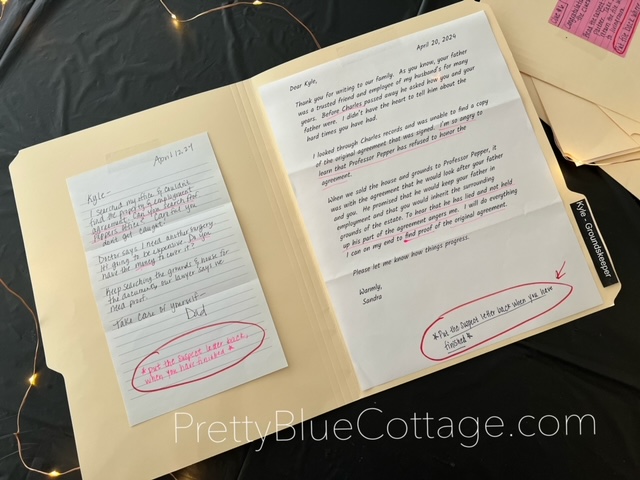
Suspect File on Groundskeeper with letters. 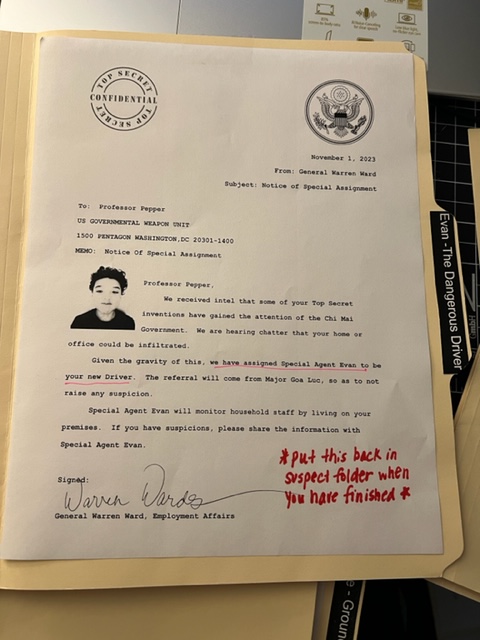
Example of a Suspect File 
Processed with MOLDIV
Once they found all of the clues in the room, it would lead to the final Suspect File. The file would read, “Congratulations! You have found all the clues to this room. Read the Suspect File, take notes, and put the file back where you found it.” All of the clues directed the guests to put the clues back where they found them and reset the room. This made it easier for my husband and me, as we didn’t have to reset all of the rooms. After they completed the room, they returned to the main the space where all of the other guests would go once they had finished searching their assigned rooms. They could then question each other and wait for the next room to open up.
The Suspect Files were all in manila folders labeled with the guest and characters name. I created most of these using Google Docs or free online sites. I found the folders at a local Dollar Tree along with the index cards. I’ll link below to my Amazon Storefront with the supplies I used for the Mystery Party.
Step 5: Decorations
A big part of a good party is setting the right mood. I personally love British murder mysteries. I’m a huge fan of Perot, Agatha Christie, Midsomer Murders, Agatha Riesen, just to name a few. I feel like the common denominator of these shows is the environment. They are usually in ornate homes with a cozy fire while the rain and wind persist outside. My home is far from ornate, but I thought I could create a cozy spot for everyone to gather. I shot this picture during the day, but imagine it at night with the rain. It was quite magical.
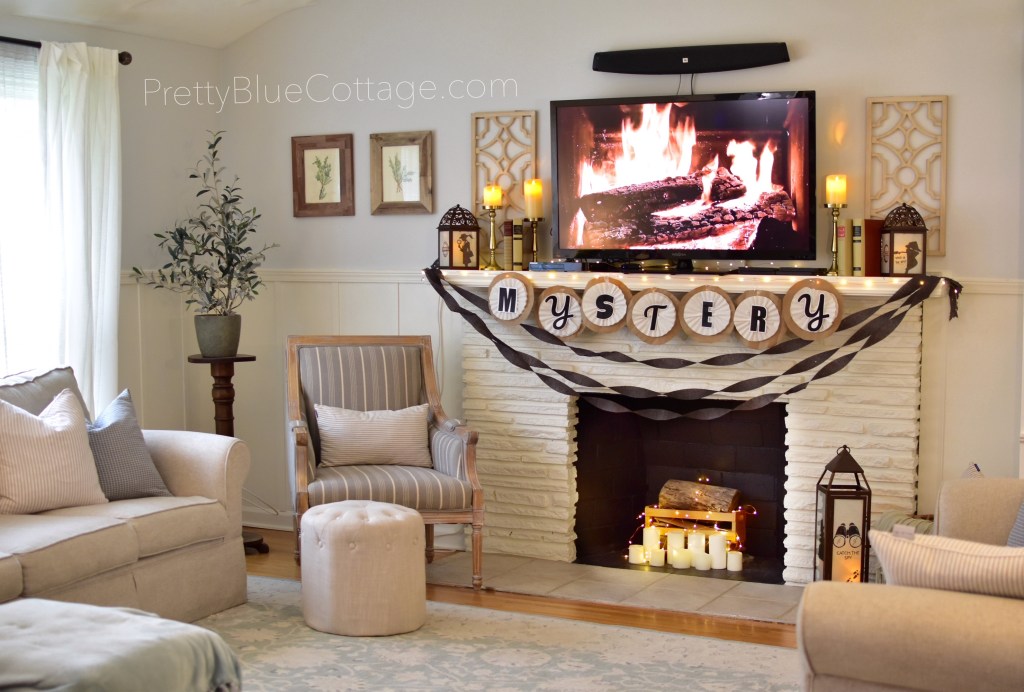
I decided to stay on a tight budget for this party. I already had lanterns and decided they would be perfect to use for the party. I thought it would be fun to create detective themed images for the lanterns.
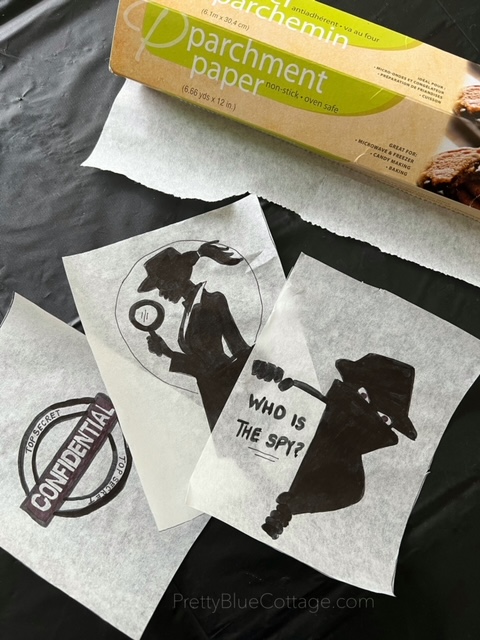
The process was easy; I got some parchment or wax paper from the kitchen and found some images online that I wanted to use. I traced the images onto the parchment paper and taped them inside the lanterns.

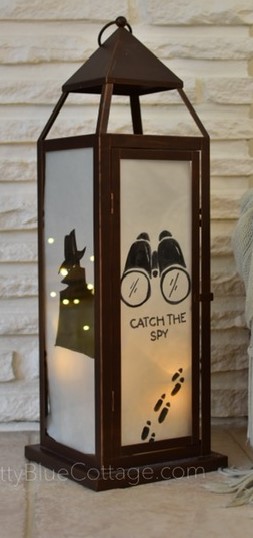
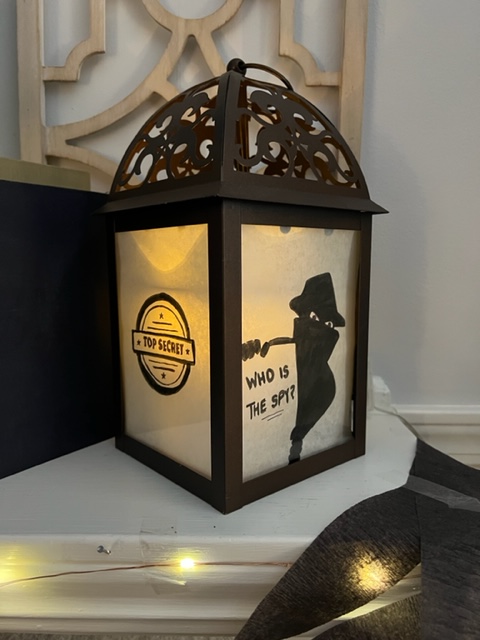
You can do a quick Google image search: black silhouette woman spy, silhouette spy man, detective silhouette etc. I don’t have a color printer, so all images needed to be printed in black and white.
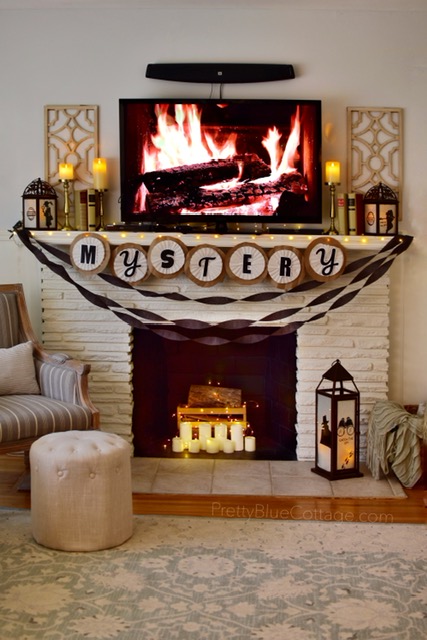
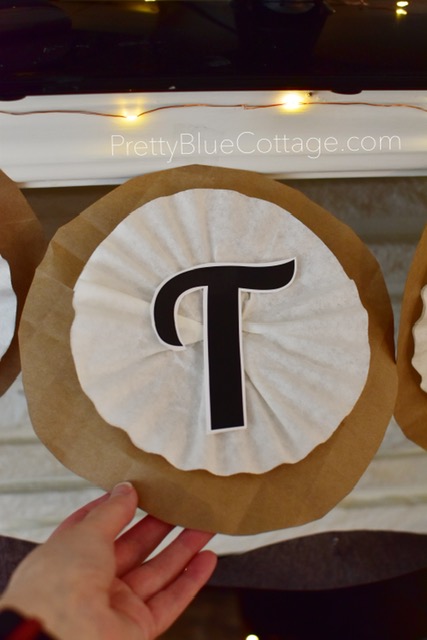
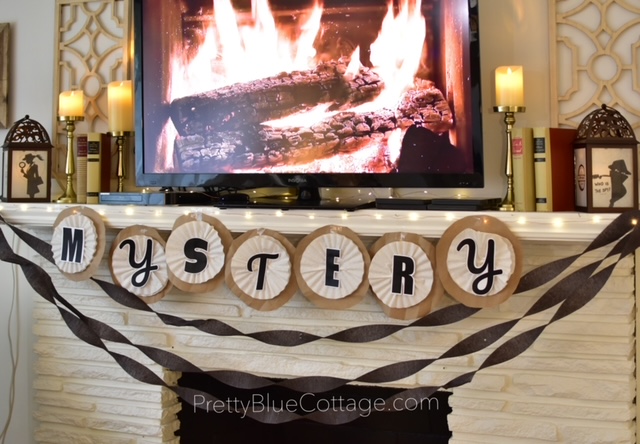
For the mystery banner I used a roll of packing paper and coffee filters. I used Google Docs to print up the words mystery and taped them on. The black party streamers I purchased at the Dollar Tree. It is super easy and cute!
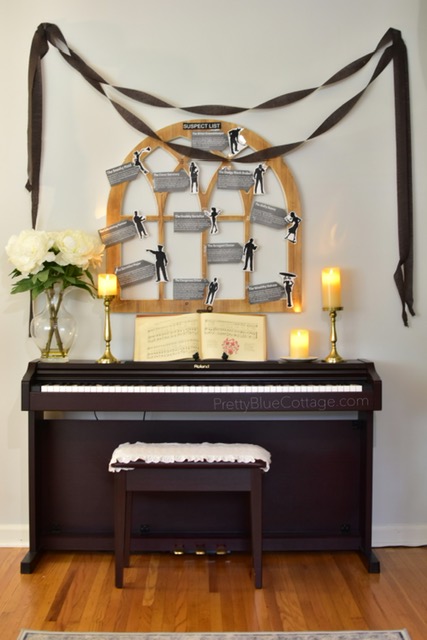


When I sent the invitations to the guests, I included a quick bio about each character along with a cutout silhouette. I displayed these bios above my piano for guests to reference throughout the night. It was easy to forget who each person’s character was and what they had said. This proved to be very helpful, especially when playing with a larger group. I found guests would gather around the piano and reread the characters’ bios when they had finished doing a room search or were working to eliminate a suspect.
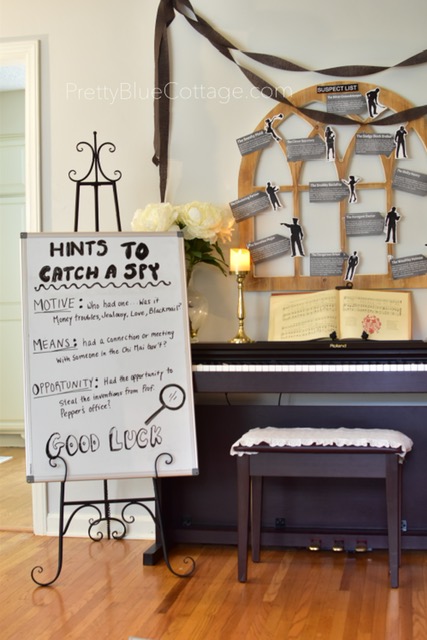
Additionally, I created a ‘Hints to Catch a Spy’ whiteboard reminder for guests. During my introduction to the game, I made it clear that the traitor or spy would need to have a motive, means, and opportunity to commit the crime. If they didn’t have all of them, they could be excluded as suspects.

I created a voting station where guests could look at pictures with their character’s name and cast their votes. The guests loved this, and many asked if they could take their picture home with them at the end of the night. I used the application SnapSeed to edit each picture and found the background on FreePik. As for how I received each person’s picture, I asked them to send me one, or when I saw them I asked to take their picture. This was such a big hit with everyone.
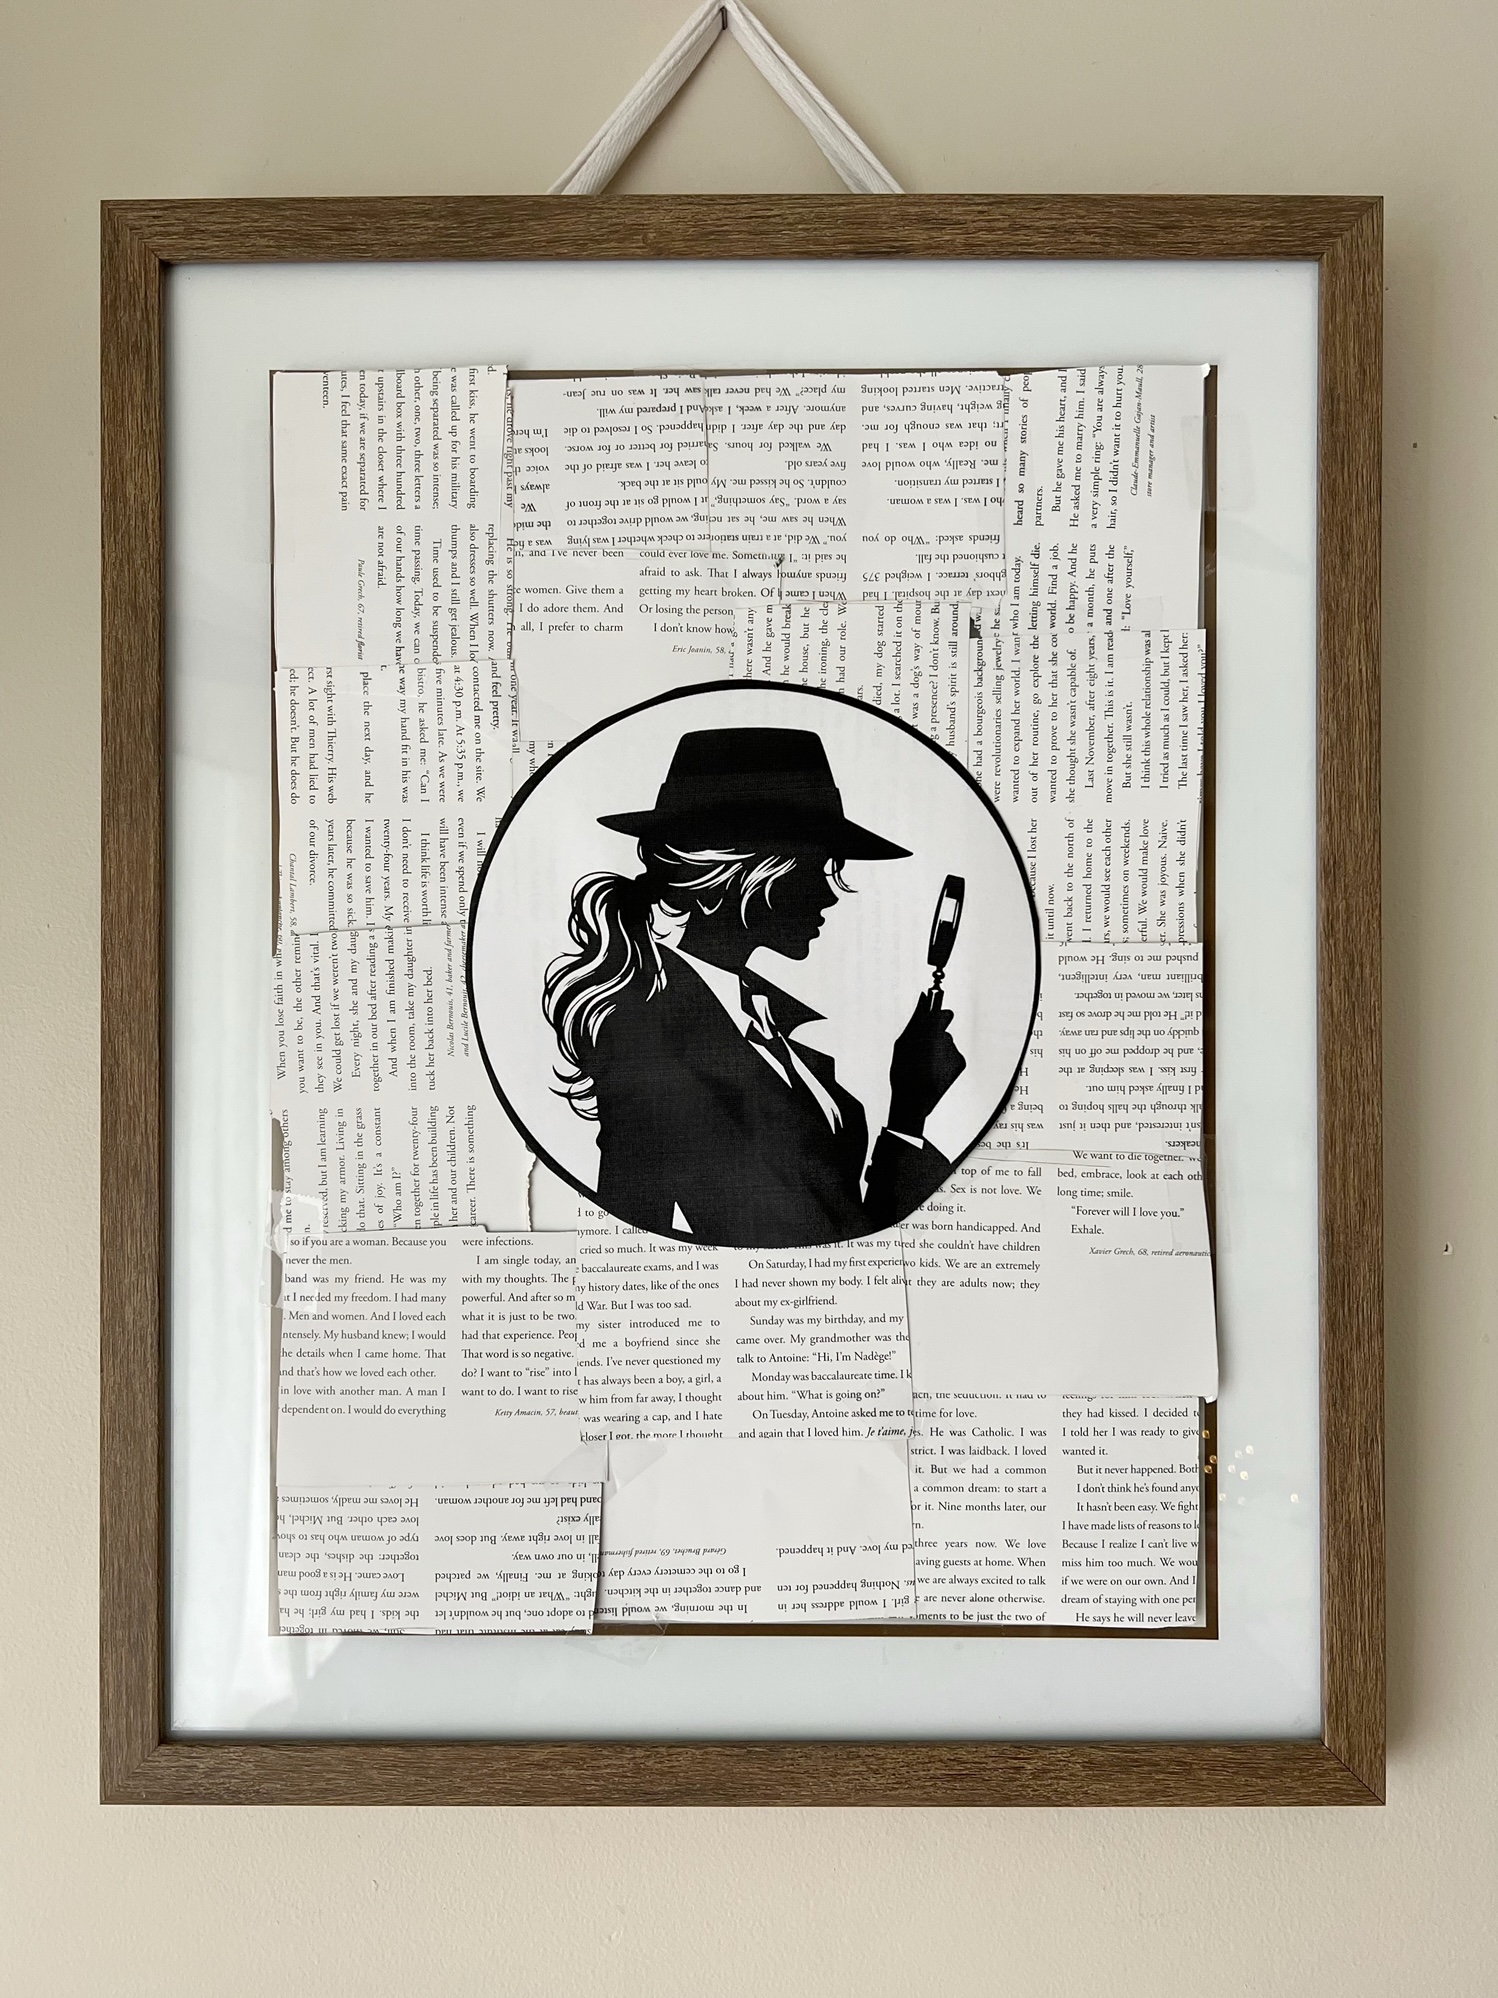
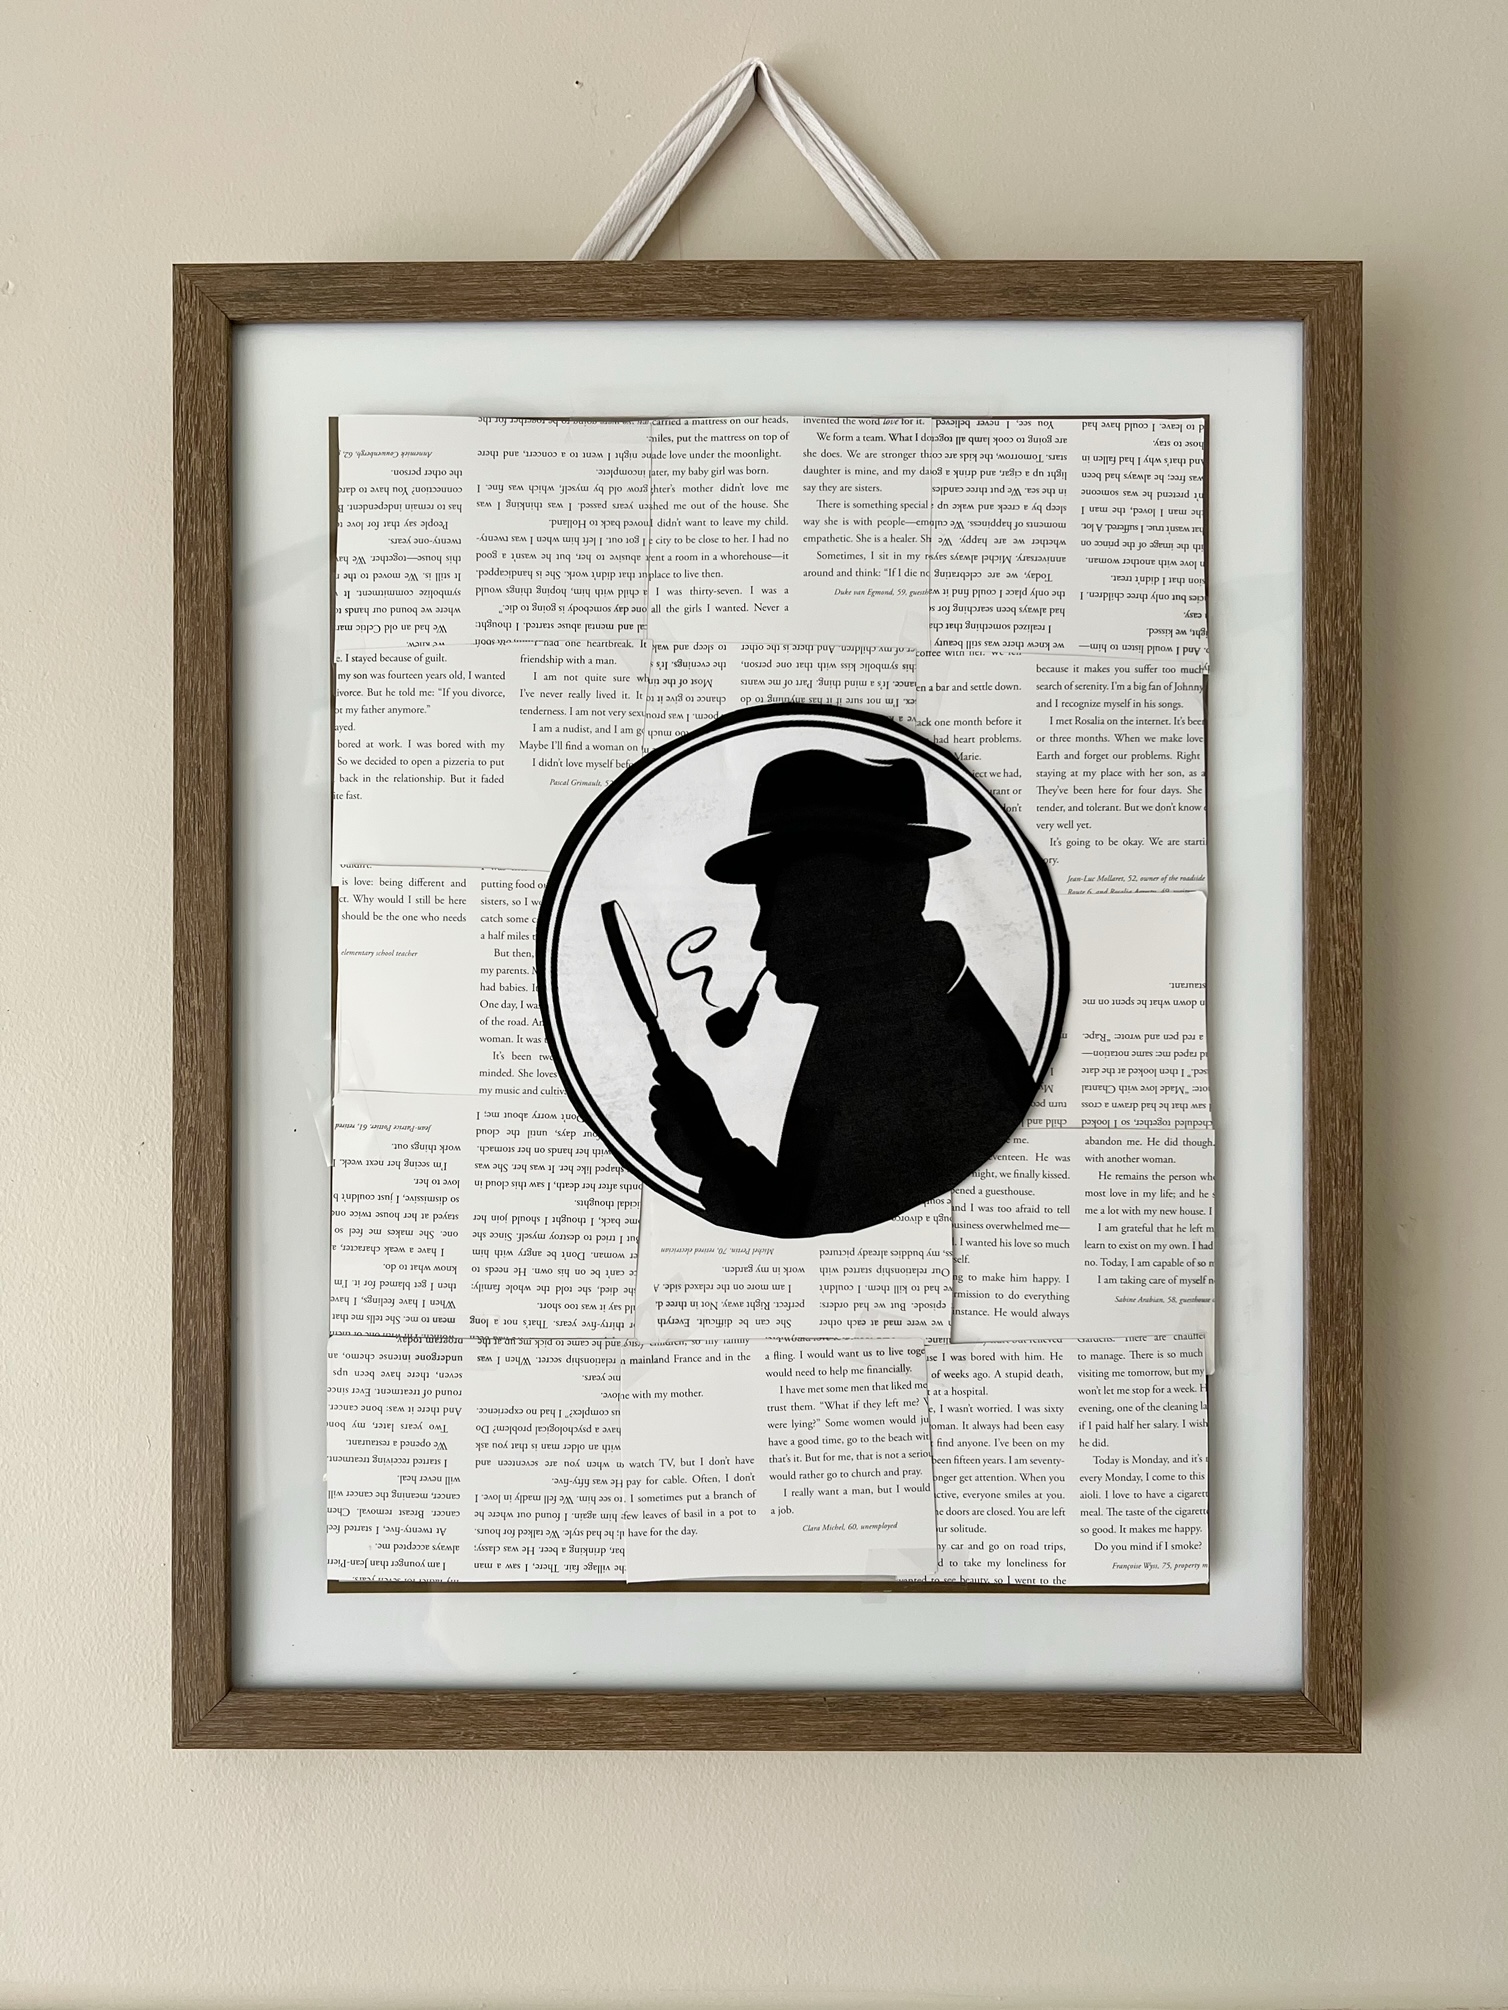
Finally, for the dining room, I decided to keep it simple – I printed up two silhouettes of detectives, both male and female, and used the leftover paper from the book I hollowed out – to tape them over my existing artwork.
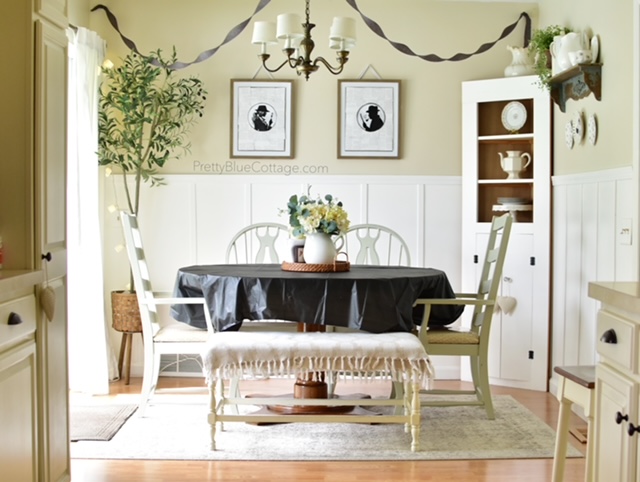
I used streamers and a black plastic tablecloth I got at the Dollar Tree. It was simple and cute!
Final Thoughts
Undergoing a Mystery Party is a lot of work, especially when writing it yourself. What I can say is that the more you personalize, the better it is for everyone involved. I had the advantage of knowing each of my guests really well; therefore, I wrote their characters to suit each person’s personality. The clues and Suspect Files made the guests excited to read them, and they loved questioning each other. It was especially fun at the end of the night for my husband, who played the investigator, to arrest the suspect! We had several photo-op moments, and him arresting her was the icing on the cake.
This was such a success, already, I’m getting asked when I will do the next one. For anyone interested in more details of how I orchestrated the Mystery Party or would like copies of my materials, send me an email, and I would be happy to share. I am planning on doing another one, so if anyone has suggestions of how they did their own, please share.

This is such a cute idea & I love how you turned it in to an interactive game!
LikeLike
Thanks so much! It was truly a success and so much fun!
LikeLike
hello, I’m not sure how to email you but I’m looking to do a teen murder mystery and would love more info on your game/ clues. It’s hard finding age appropriate kits. So need to make my own for a birthday party. Can I get the best email from you to get copies?
thank you!
LikeLike
You can email me at prettybluecottage@gmail.com and I’ll send the info along to you 🙂
LikeLike
Everything about this themed dinner I LOVE!! From the name to all of the clever details
Thank you for the inspiration.
I would love if I could use copies of your material. I would like to throw a mystery dinner party in the next 2 months but I don’t think I have the bandwidth or mental capacity to think of a whole story line right now.
LikeLike
Sorry for my late response! Shoot me an email, so I have your email address and I’ll send you copies 🙂
Thanks!
LikeLike
Could I also have copies if you still have them? I have to plan a last minute party with this theme in only 2-3 weeks 😬
LikeLike
Please send an email to my gmail account at prettybluecottage@gmail.com
LikeLike
These are great ideas! I did a Harry Potter escape room party last year for a group of 22 adults. This year I’m doing a murder mystery dinner… it’s so much work to do the scripts and story line and make sure it all makes sense! Good job!
LikeLike
Thank you! You are absolutely right, it takes so much work. I hope you have a wonderful mystery dinner party. Thank you for stopping by 🙂
LikeLike
The party looks amazing. I would love a copy of your script and materials. I would love your email?
thanks
LikeLike
you can send me a message at prettybluecottage@gmail.com
LikeLike
Hi there!
I just wanted to say I find all this amazing! The imagination, detail and care: it’s impressive! Thank you!
I’m having a big family dinner just before Christmas and I’ve been thinking on how to make it an exciting adventure for all, kids and grown-ups. I’ve never done anything like this and you’ve inspired me to give it a go!
Would you be so kind to share your materials with me? I just might be able to “get away with it”! 🙂
LikeLike
I would be happy to share. Just shoot me an email and I can send it to you prettybluecottage@gmail.com
LikeLike
Hi there!
I just wanted to say that I find all of this amazing! The imagination, the detail and care: it’s impressive! Thank you!
I’m hosting a big family dinner before Christmas and I’ve been thinking on how to turn it into an exciting adventure for all, kids and grown-ups: I’ve never done anything like this and you’ve inspired me to give it a go!
Would you be so kind to share your materials with me, please? I just might be able to “get away with it”! 🙂
LikeLike
Hi Sara,
Thank you for your lovely comment and my apologies for taking so long to reply. What a fun idea. We always play games at Christmas, this will for sure liven things up. I would be happy to share, please shoot me an email (if you haven’t already done so) and I will send you my materials. prettybluecottage@gmail.com
LikeLike
i wish I could come up with some other words than what has already been said about your creativity to do this! I love what you have done with this game and how much time you spent on it. We are planning on doing a murder mystery party for a family vacation gathering and did not want to buy an expensive game. Would you still be willing to share your material? I am very impressed with all you did to accomplish this fun game! My email is: pate813@att.net. Thanks so much! Pat
LikeLike